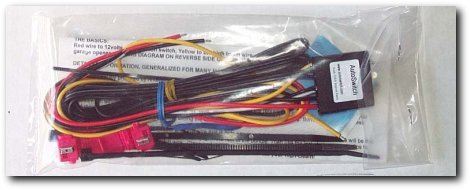
What's In The Bag
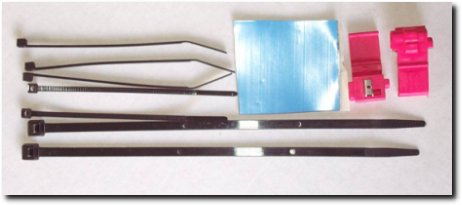
Cable Ties, Adhesive Mounting Tape, and Wire Taps
Technical Information
- Housing Dimensions: 1.42" square, 0.315" thick
- Weight packaged: 0.244 Lb
- Wire type: #20 600V rated
- Max current draw for Autoswitch trigger wire (violet) is 200mA @12Volts With 150mA preffered maximum
- Weight installed with wires: 0.202 Lb
- Wire lengths: Power feed, 24" Sense wire orange 72"
- Package includes: 3 8" tie wraps, 6 4" tie wraps, 2 wire clips, adhesive tape, instructions.
How It Works
AutoSwitch model 5NB2 works by sensing the chassis-ground connection from the TSC when the button is pressed twice quickly. The visual LED blinks rapidly during the timed "window" up to 1.2 seconds long during which the 2 taps must be completed. The single tap on the TSC button to cancel the turn signal will not activate the Autoswitch. LED shines green to indicate power to your auxiliary lights relay.
Wiring
Installing the Autoswitch will not alter your existing wiring and can never cause a malfunction to your existing circuits. The Autoswitch simply taps any 12 volt wire after the ignition switch for power and the GROUND wire coming from the turn-signal-cancel button Add connections to ground and the coil of the auxiliary light relay and you have installed the Autoswitch!
The following paragraphs were provided by Sean at http://www.cyclegadgets.com.
For the R1100RT, most connections can be made in the fuse box under the seat. The Turn Signal Control module is a 1" x 2" cube in the right rear of the fuse box. Pull it up (do not disconnect it). There are about 12 wires underneath. Cut away some of the sheath, and locate the Brown wire with White Stripes. Tap the Orange wire from the Autoswitch into this.
On the K1200LT, the wiring is a little more complex. We recommend locating the Autoswitch under the seat, where you can connect the Red and Black to power and ground as outlined below. Route the ORANGE wire up to the front of the bike, and use Zip ties to fasten it to a wiring bundle or brake line leading to the right handlebar assembly. Remove the handlebar cover (two 3mm Hex screws from below). Cut away some of the sheath from the largest wiring bundle, and locate the Brown wire with White stripes. Tap into this wire.
For other BMW models with a turn signal cancel button, you will need to locate the wire leading to that button. It will generally be brown with white stripes, and you can test it by using a meter to confirm that the wire shorts to ground when the turn signal cancel button is pressed.
For all bikes, connect the Red wire to power. An ATC fuse tap (available at an auto parts store or Radio Shack) is an easy solution in most cases. Choose a fuse that is "hot" only when the ignition is on.
Connect the Black lead to a chassis ground. You may need to extend the black lead with a piece of scrap wire to reach a suitable frame or battery ground point.
The Violet wire controls your lights. If you are using a Cycle Gadgets lighting kit, attach the Violet wire to the Alternate Control Harness. For other lighting solutions, attach it to the +12V coil terminal on the light kit relay.
There are many options for mounting the LED, depending on the amount of effort you want to put into it. You can drill a hole small enough for just the lens of the LED in the dash and use silicone adhesive to hold it in from behind, fasten with a cable clip at the front of the fuel tank, etc. We have found that it's pretty easy to get the hang of the Autoswitch timing without a visual cue, so you may find it adequate to just coil up the LED under the seat and not use it at all.
For additional information, please view our Relay Basics for the Novice page.
Installation
Use the Autoswitch and have a hidden switch working for you. The Autoswitch is easy to install. If you already have auxiliary driving lights installed with a controlling toggle switch and relay, Put the Autoswitch VIOLET and the BLACK wire where your toggle was connected on the relay coil pins. Tap the RED into any ignition-swtiched 'ON' wire for power, ORANGE wire to the turn-signal cancel button wire. Add connections to ground, and neatly tuck the Autoswitch and wires out of the way in any convenient location. And without building a bracket, drilling any holes, or modifying your dash, you’re done!
